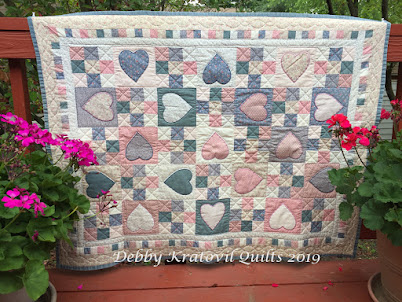
Stacked Hearts for Valentine's Day
I've made a lot of quilts with hearts. In fact, the very first quilt I made was a kit I bought from Family Circle magazine that featured hearts and 9 patches. Do you remember those kits that were advertised in the back of the magazines? I think I paid almost $50 for this kit back in the early 1980s! I was choking on the price, and then I saw how easy it would have been for me to have gone to the store to buy the little bits of fabric! NEVER AGAIN HAVE I BOUGHT A KIT!!!
 |
| My first quilt from a kit (and last quilt from a kit!) |
I hand quilted it and I still own it. Faded but well loved. Here's a recent quilt block I made using a pattern from 2012. I pulled some Kaffe Fassett prints and supplemented with some blenders. The center Stacked Hearts block (the rectangle) is raw edge appliqué.
 |
| Stacked Hearts mini: 21" x 21" |
Here is the first one I made (the original pattern was digital and in my 2012 desktop calendar).
 |
| Stacked Hearts: 21" x 21" |
Let me show you some of the steps in making the blue one above. The cutting of that directional print is a MUST SEE, so stick around for that. First is the freezer paper template. I had used it before so it was already cut. Ironed to fabric that has fusible webbing on the wrong side.
 |
| Freezer paper template ironed to front of fabric |
Then I cut it out and carefully removed the template. Lovely, huh?
 |
| Stacked Hearts template measures about 7-1/2" x 9-1/2" |
Then I auditioned thread. It's important that the bobbin thread matches, too.
 |
| Auditioning thread |
And how does it look on the back after stitching? Just a lowly zigzag gets the job done! I made sure my stitching was ALL on the red fabric and none showing on the light blue background.
 |
| Here's how it looks from the wrong side |
It was easy to set the rectangle on point (directions and photos are in the pattern). But, I knew I would be in trouble if I cut those outside setting triangles without any forethought. There is a KEY to cutting fabric for triangles IF you want the directional print to run ALL THE SAME way! (Ask me how I know?!!)
I cut my squares as stated in the pattern. Then I put them side by side. I cut them as shown in what I call a "mountain" cut. The left square is cut from bottom left to top right corner. The right square is cut from top left to bottom right corner.
- The left square will provide the top left and bottom right setting triangles around my block.
- The right square will provide the top right and bottom left setting triangles around my block.
- Can you see it?
 |
| The key to cutting outside/setting triangles using a directional print |
Let's see the block again and I think it will all come together and make sense.
 |
| Stacked Hearts block with directional setting triangles |
And one more way that I used this appliqué - I used it as the basis for a whole cloth quilting pattern. I like to share this with my machine quilting classes. I had ironed the freezer paper template to the pink fabric and stitched around it, peeled the template off and then quilted inside the space with loops and then what I call "flames" outside. I love this little mini!
 |
| Stacked Hearts mini with whole cloth quilting |
There are so many fun ways with hearts. I hope you enjoyed seeing what I did with a stack of them!

I feel the same way about kits. Love Stacked Hearts.
ReplyDeleteThanks