 |
| Antique Midnight Sun Quilt - 70" x 85" |
I'm often asked where I get my inspiration from. I have to say: from traditional quilts! Why should I reinvent the wheel when there are so many glorious quilts that are timeless? All I do is just change out their clothes, giving them new colors. This quilt appeared in a magazine years ago and is called "Midnight Sun." It was probably pieced by hand and used carefully cut templates. How did I update it? So glad you asked!
 |
| Seeing Red - 38" x 38", Block Size: 15" |
Well, here you have it. Seeing Red is my version of the Antique Midnight Sun. Four blocks and I was done (could that be because I also ran out of fabric?) Don't you love those sharp points? And don't you just love templates and hand piecing - NOT!!! All foundation pieced. This appeared in my 2013 book, Paper Piecing Perfect Points.
 |
| Yes, you can have blocks with VERY SHARP POINTS! |
I loved the block so much that I am almost finished with another 5 of 6 blocks, which I began almost 2 years ago. This time, they are in other colors. I will sew the blocks until I run out of fabric, then go looking for border prints. That's just the way I've always worked. I first love the block and sew up as many as I can. Then, and only then, do I determine what size the quilt will be. Crazy? Maybe, but hey, this is America (where I live) and so far, it's not against the law.
Here's my process, so you can see how easy - and PRECISE - foundation piecing can be. I shared these steps in 2013 and figured it would be nice to see the process again. And the finished quilt!
 |
| Select 3 fabrics; cut the rectangles for paper piecing |

|
| Sew on the line, following the numbering sequence. Ready to trim. |

|
| Notice how the lines criss-cross IN THE seams. That secures the points so they don't "unsew" when removing paper |
 |
| Look how many I've made! Aren't they beautiful? Sharp points! |

|
| Four units ready to be stitched together. Yes, there's a hole in the center. I'm not done! |
I love showing the back side (not mine; shame on you! the back side of the block!) Notice a few things:
- Because of my method of trimming a patch, leaving 1/4" seam allowance BEFORE adding the next patch, it really looks like I've used templates. But you KNOW I didn't.
- I pressed the four joining seams open; reduces the bulk.
- It's OK to leave in the little snippets of my paper. It is pulp and won't hurt anything and will dissolve should the items be washed.
- I covered up the center hole with a self-faced (non-fusible interfacing) circle and then machine appliquéd it on using a tiny zig-zag stitch and mono-filament thread.
 |
| Back side of the block so far |
 |
| Front side of Midnight Sun block |
Here is the full block. Same size as "Seeing Red", but now wearing different colors.
 |
| I actually reverse appliqued the outside background piece to the center - not this way in the book! |
I made enough paper pieced units for 3 more blocks. Had to dig through my stash for a substitute fabric for the outside floral print. Found something. These are 15" finished blocks so my new center of 9 blocks is going to be awesome!
Fast forward 6 years to 2019 and I decided that I would never put these together and so gave them to my local quilt guild to finish. They sewed them block to block and my friend Jeannie C. quilted it; I put the binding on. This went to our charity endeavors.
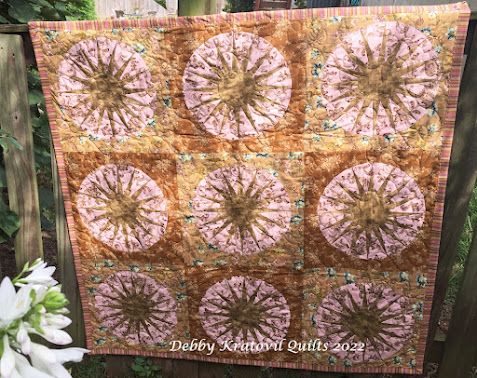 |
| Updated Midnight Sun: 45" x 45" |
I sell my book, Paper Piecing Perfect Points, as a 92 page digital pdf on a CD. It's exactly as it appears in print (since I wrote all the directions, designed all the art and templates and foundations, made all the quilts, etc). You can purchase it from me for $15 and $3 postage. Send me an email (kratovil@his.com) to find out how to do that (PayPal is best).
Take a visit to my Etsy shop to see several more quilts made using foundation paper piecing.


Comments
Post a Comment
Thanks for stopping by Debby Kratovil Quilts! If you had a question and don't get an answer from me, please feel free to email me at: kratovil@his.com