Jewels from the Past
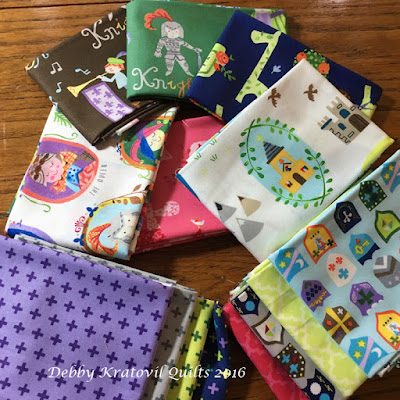
Meet the Royal Court is a delightful novelty print from Windham Fabrics, with images of kings and queens, jesters and even the Royal Pet! The other dayI pulled out the remaining fat quarters and they reminded me of this post from 2016.
I wanted to revisit what I did with these fun fabrics. Let me recap:
I am enamored lately with the 60 degree jewel shape (some call it a "gem"). It is basically a 60 degree diamond with a triangle lopped off of one end. I am not too keen on single size templates. I mean, what if you want to work with a different size? Then you either are out of luck or have to buy another one. Why not use the lines on your acrylic ruler? Why not, indeed! Then you can cut just about any size diamond and jewel.
First, here is the fabric collection:
First, here is the fabric collection:
 |
| Fat quarters of Meet the Royal Court by Windham Fabrics |
Because I only have an 18" x 22" piece of each fabric, I am limited in what I make. I love those sorts of challenges.
I cut 4-1/2" strips from most of the prints, saving the larger prints for a border. Then using the 60 degree line on my 6 x 12 ruler, I lopped off the left side. Then I measured 4-1/2" from that cut and made a second cut for my perfect diamond! This diamond measures 4-1/2" in size from flat side to the opposite flat side - in both directions. I was able to get 3 diamonds from each 4-1/2" x 22" strip.
I cut 4-1/2" strips from most of the prints, saving the larger prints for a border. Then using the 60 degree line on my 6 x 12 ruler, I lopped off the left side. Then I measured 4-1/2" from that cut and made a second cut for my perfect diamond! This diamond measures 4-1/2" in size from flat side to the opposite flat side - in both directions. I was able to get 3 diamonds from each 4-1/2" x 22" strip.
 |
| 4-1/2" diamonds |
Then because the jewel shape will finish to 4", I used the 2" line (half of 4) and cut off one point as shown below:
 |
| Cut a 2" triangle (using a 60 degree ruler) from one pointed end. |
I did this with all my diamonds:
I did fussy cut some of those motifs. I cut a freezer paper diamond, made it into a jewel, cut out the center and then was able to center the motifs I wanted.
 |
| A whole slew of jewels |
I did fussy cut some of those motifs. I cut a freezer paper diamond, made it into a jewel, cut out the center and then was able to center the motifs I wanted.
 |
| Fussy cutting a jewel shape with freezer paper "window" template |
Then I selected a light print (using another Windham print from another collection) and cut 2-1/2" high 60 degree triangles. Twenty-four of them, to be exact.
Then with my plan, I began placing the "jewels" on my design wall, moving them around. I decided to keep 3 matching sets in the center, sort of like hearts. The rest were randomly placed.
But how to sew them? You can see in the diagram below how I sewed them into six equal sized large triangles. Then the pieced triangles into a large half-hexagon and then into the very large (20" high) pieced hexagon. I colored the top pieced triangle so you could see the piecing sequence. No set in seams; all straight seam sewing. All of the remaining jewel shapes are the random colored jewels patches.
Then I cut four 30 degree triangles from the green fat quarter. I actually got all four from that one piece. I did have to audition the cutting with a large piece of paper - no room to make a mistake!
 |
| Adding borders |
And here is the little quilt which measures 20" x 24":
 |
| All the King's Jewels with Meet the Royal Court fabrics by Windham |
I donated this to my local guild for a children's charity. Wish I had a photo of it quilted, but I'm sure some little kid has loved it!


Another amazing pattern, with no icky seams to sew, just straight-forward. I like the way this looks, and can imagine many different kinds of color combinations which would be anything from elegant to humorous! Thank you for another inspiration!
ReplyDelete