Posts

Showing posts with the label Paper Piecing

I'm Dreaming of Snow Crystals
Image
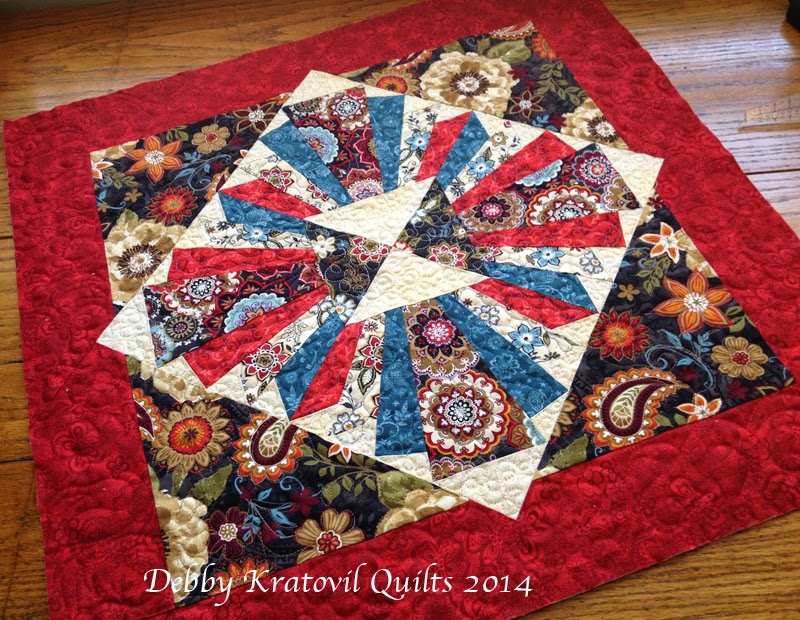
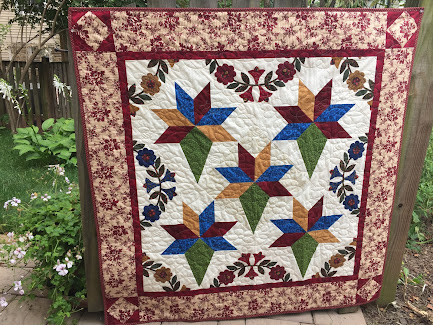
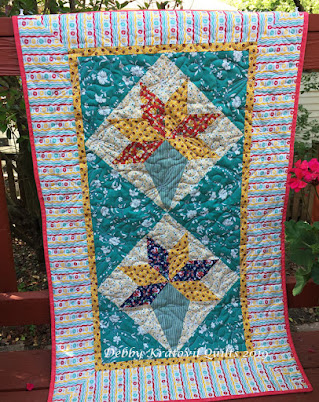
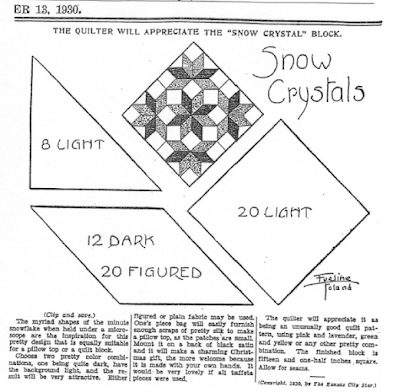
My Snow Crystals quilt was a hit Monday night when I spoke with a local guild, sharing my tips and tricks and quilter's shortcuts. Most of my quilts are vintage inspired and this was no exception. Take a look at the pattern page from the Kansas City Star in 1930. Would you like to use those templates? And sew y-seams? NO, not me! Page from the Kansas City Star Also notice that this is NOT four blocks but one. There are what seem to be 4 stars, but what's with the fifth star in the center? How did the designer think this up? Very clever, right? I made my own Snow Crystals quilt about 20 years ago - again, vintage inspired. Snow Crystals  - 24" block; 33" x 33" quilt Yes, these star units are paper pieced, but they can easily be rotary cut. I created a photo lesson for Quilt Magazine to go along with the quilt. (Yes, it says Windmill Star, which is another name for the star block). Here is the coloring chart which is a MUST for this pattern!  Snow Crystals  found...

Sassy Mariner's Compass

Image
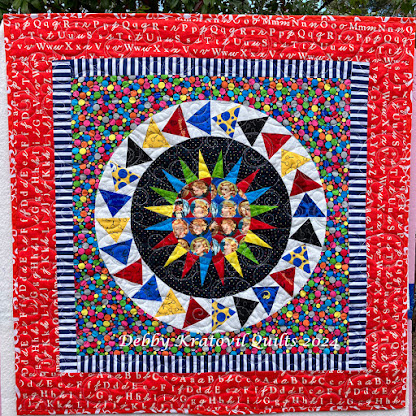
This is not just a Mariner's Compass, but it's Sassy! Why sassy? It has an extra ring of points that was supposed to fit but I measured wrong. I could almost hear them mocking me and my bad math. I made the top in 2011 and it waited 13 years to get finished! I had originally proposed it for my 3rd book, but Martingale didn't want it (so why quilt it?) Sassy Mariner's Compass: 36" x 36" This began with the center compass which is the basis for my Beginner's Mariner's Compass class. An easy 16" block with curves gentle enough for a novice quilter. Then the halo of points were supposed to connect to the center, but I didn't measure correctly and after I pieced all of them I discovered a 1" gap! Yikes!!! So, I had to add the red donut ring and voila! they all fit together. There is a lot of piecing, but because it's done on paper foundations, the points stay as points and my students were happy as clams to discover they had a compass they...

Paper Piecing Rattlesnakes

Image
 Oh, calm down. Not THAT kind of rattlesnake. Why would I do that to you? Some of this is a repost from 7 years ago because I've revisited my box of paper pieced rattle snake blocks this weekend. I rarely use anyone else's pattern (I don't get paid to do that), but I took a class 20  27 years ago with the Karen Stone paper pieced Rattlesnake pattern as the feature. I made a quilt out of flannels and it somehow fell into the hands of my daughter who used it for the dog to snuggle in. Want to see that? Original Rattlesnake quilt I used this pattern, published in 1996: Karen Stone's Rattlesnake pattern I have made a variety of units since that first quilt, some made with batiks. These will be stitched into background units to become 10" blocks: Batik paper pieced units This is what the unit looks like from the paper side after trimming: Single foundation Here are some of the batik blocks on my design wall. 10" Rattlesnake blocks being auditioned on my design wall...

Rising Sun

Image
I traveled to New York and back this weekend to celebrate my father in law's 99th birthday! We drove through Rising Sun, Maryland. I said to my husband: "You know. I have a quilt with that name." (No surprise there!) My paper pieced rendition of the traditional Rising Sun block (14", composed of four 7" units) I have made this several times and it even was a popular workshop. It also appears in my 3rd book, Paper Piecing Perfect Points. I call it "Casablanca Sunrise." That was also the name of the fabric collection I used at the time (well over 10 years ago!) Casablanca Sunrise quilt using the Casablanca Collection by Blank Fabrics  Well, what happens when you make more than one block? Let me show you. (Sorry that the picture isn't as bright as a sunrise, but I think you get the idea). This quilt uses FOUR blocks, but because of the way I have turned 1/4 of each block, it creates the illusion of FIVE blocks. Neat trick, huh? And will you look at th...

Finally Finished!

Image
Oh, not me! Another quilt! I began this quilt in 2013 and added borders several years later. Quilted by a guild friend a few weeks ago, as it was going for one of our group's charity endeavors.  Nancy Drew Flying Geese quilt : 34" x 34" I was using the Flying Geese ring pattern and the center Dogwood Blossom pattern (both my own), but I ran into some problems. First I pieced the ring. The center circle has a diameter of 14". I forgot to consider what my inner pattern would finish to  . . . Circle of Geese units Then I made the center using some Nancy Drew fabric (which are also in those geese units above). Circles of Geese surround Nancy Drew Oh, sure. Everything looks fine, until you see this block from the back! Can you see the thin 1/4 circle black strips (called "compensating" strips) I had to add in order for the center to fit with the Geese ring? Back of block with coping strips This was not pretty, but doable for me, a quilter with decades of sewin...

The Bird Songs are Back

Image
Yes, you know it's Spring (or almost Spring) when you hear the tweet-tweets outside your window before the sun comes up! And just in time to give them some birdhouses. I finished my Home Grown birdhouse quilt (actually, the second one) a few weeks ago. I quilted it myself and put the binding on. I used four of my upsized Birdhouse patterns  with a height of 10" Words to Live By: 44" x 44". Using a large panel in the center One of my neighbors took a nasty fall last summer when she and her family were on vacation in Switzerland. She broke her foot and had to have several pieces of metal screws to keep things together put into her bones! I ran into her last week and she told me she broke one of the screws and needed surgery again. I felt she needed some cheering up so this quilt went to live with Nicole. Can I say how good it made me to see how ecstatic she was to get this? I know I cheered her up and her smiles made my day. This quilt is the cousin of my first birdhou...

Another Quilt Finish

Image
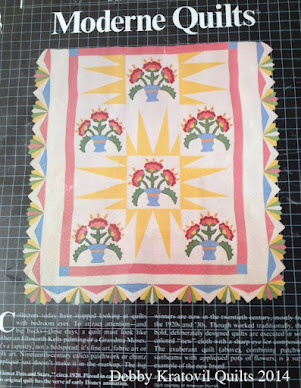
You've seen this quilt before. I call it Metropolitan Home Star . That's because I first saw this vintage quilt in a Metropolitan Home magazine in the late 1980s! Here is the page I tore out of the magazine. I had it laminated and I still have it! Here is my recent finish, as I am also retiring this workshop. I've taught it a few dozen times. I converted the large points to paper piecing. This is a smaller quilt because I only used one star. The block is a whopping 21" x 21". Each of those paper pieced units is 7". Single Metropolitan Home Star : 31" x 31" I made a large, four block quilt for my second book (Supersize 'Em Quilts, 2009) and my editor/publisher didn't want to use that name. I had to call it "That Spiky Thing." And it was so beautiful that it made the cover of the book! Here are the parts before I assembled still another quilt, only this time in an asymmetrical assembly. Block parts And the quilt (before final borders...

Nosegay Quilts: Day Four

Image
I discovered a photo in one of our old magazines (Quilt Magazine, Spring 2005) of a vintage Nosegay/Bride's Bouquet quilt. I scanned it the other day and here she is in all her old time glory! Bride's Bouquet Quilt: 59" x 76" The blocks are 12" and when we ran the pattern, we included templates - lots of them (5 different ones!) Would you like to see what they look like? Nosegay Templates! Does this make you want to run and make one of these? Not me! If you would like to try your hand at making one of these quilts, I've just published a 12 page pdf in my Etsy shop. Go check it out and see all the photos! Old Fashioned Nosegay . NO templates, just easy foundations for paper piecing.  And I keep the fabric waste to a minimum; as you can see, the 45 degree diamonds can be cut (oversized) using your standard ruler! Cutting the diamond patches for foundation piecing Thanks for giving me the chance to share my Nosegay quilts!

Nosegay Quilts: Day Three

Image
I'm back with my last 2 Nosegay quilts. I think I'll show you the best one first! I was inspired to make this from a 2010 magazine. They had pieced some Bride's Bouquet blocks (like these) and cut up a pre-printed panel of Baltimore Album motifs. I remembered I had some similar panels languishing in my closet. Nosegay blocks set with pre-printed motifs When I gave this to my longarm quilter and told her it was destined for a charity quilt, she was shocked. She first thought that was ALL hand appliquéd. Ha! Not from my hands. Maybe you have some of these long ago printed motifs. Pull them out and make some blocks to go with them. Here is the last set of my blocks. I made them using some Kaffe Fassett prints. 12" Nosegay block set on point (pieced cone)  I was short on that green striped fabric and had to piece it. So what? Piecing a stripe like this - you really can't see the seam can you? And how does the wrong side of this paper pieced section look? Wrong side of ...

Nosegay Quilts: Day Two

Image
I had enough fabric leftover from Monday's quilt to make a 2 block wheelchair quilt. They were just too pretty to sit in the workshop box alone. What do you think? 2 Block Nosegay quilt: 27" x 44" I donated this to my local guild's charity endeavors. Remember, a 12" block set on point is 17"! I made some more blocks with a collection by Windham called Solstice. Here are the units that are paper pieced and trimmed before joining together. Notice the base "cone". Units for one Nosegay block The cone utilizes a stripe and I needed to make sure it would be oriented correctly. I rough-cut the patches using an oversized piece of freezer paper. Rough cutting the cone base And several blocks: And my final quilt top. All I had for the blocks and center were fat quarters. I used a different collection for the outside borders. Solstice Nosegay quilt top: 48" x 48" I'll be back on Friday with my last 2 Nosegay quilts. Here's a teaser for one ...