My Snow Crystals quilt was a hit Monday night when I spoke with a local guild, sharing my tips and tricks and quilter's shortcuts. Most of my quilts are vintage inspired and this was no exception.
Take a look at the pattern page from the Kansas City Star in 1930. Would you like to use those templates? And sew y-seams? NO, not me!
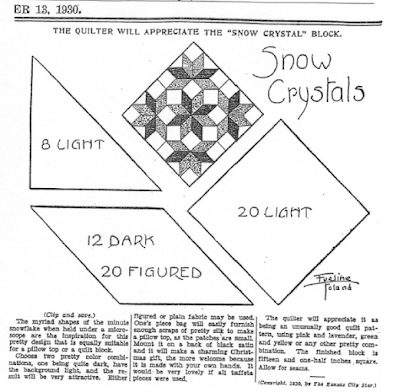 |
| Page from the Kansas City Star |
Also notice that this is NOT four blocks but one. There are what seem to be 4 stars, but what's with the fifth star in the center? How did the designer think this up? Very clever, right?
I made my own
Snow Crystals quilt about 20 years ago - again, vintage inspired.
Yes, these star units are paper pieced, but they can easily be rotary cut. I created a photo lesson for Quilt Magazine to go along with the quilt. (Yes, it says Windmill Star, which is another name for the star block).
Here is the coloring chart which is a MUST for this pattern!
I cut my diamonds oversized and placed them on the foundation. Then I added the triangles. Of course, you place the fabric on the unprinted side and then flip it over and stitch on the printed side.
 |
Fabric placement
|
Here is a photo from the lesson. We used red thread so our readers could see things! As you can see, the fabric patches are cut oversized. They will be trimmed later.
 |
| Stitching through the paper along the lines |
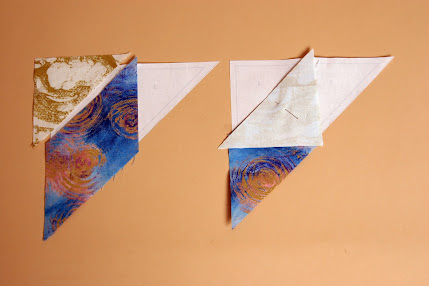
When the pattern is trimmed around the outside edge, this is what you get. And then you make more of these in the colors that you chose (based on that coloring chart above). The finished unit is the mirror image of paper with the printed lines. This is the most confusing aspect to foundation paper piecing for my students. That's why I always have lots of samples and steps!
 |
| Finished unit is mirror image of the paper side. |
And here's the companion to this unit from the back:
 |
| 1/4 of one star |
Paper HAS to be removed before stitching the units together (not what you see in the above photo which is just showing you which units get joined). You honestly CAN'T stitch through the paper and then tear it out without weakening (and ripping) your seams. Support the beginning of a seam so you don't open it!
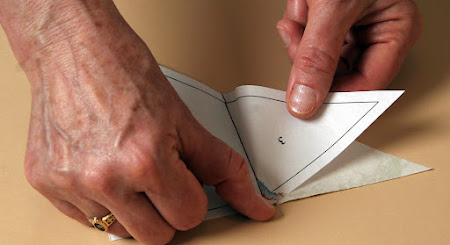 |
| Carefully removing the paper |
Because you follow your own coloring chart, this is what four units will look like. This is really a Lone Star with 1/4 of the block units turned 180 degrees (bottom right green/orange unit).
 |
| 4 pieced units ready for seams |
If you had pieced this as a traditional Lone Star, this is what it would look like:
 |
| Traditional Lone Star from wrong side. |
Remember, there's nothing tricky about this. It's a fun way to rearrange the basic units/parts of a Lone Star block and when you do it four times, it creates the illusion of a fifth block in the center!
Check out the listing for the 11 page pdf!


Comments
Post a Comment
Thanks for stopping by Debby Kratovil Quilts! If you had a question and don't get an answer from me, please feel free to email me at: kratovil@his.com