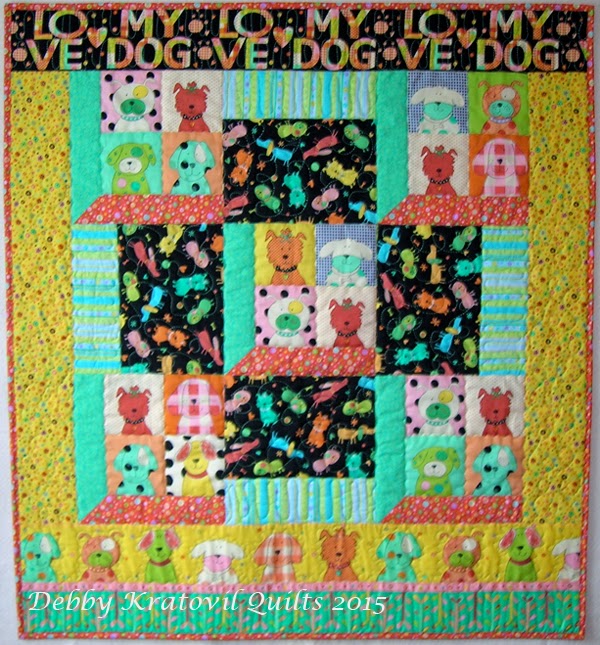
Here I am revisiting the quilt I shared last Wednesday made from the beautiful
Peyton Collection by Windham Fabrics. I was sent a bundle of fat quarters. I love the challenge of having a limited amount of fabric and setting out to make something bigger than a pot holder or place mat!
 |
Peyton's Star. 28" x 28" |
This is not meant to be a pattern, but general instructions on my process.
This is a FAT QUARTER FRIENDLY quilt! For the 19" center star, I used one fat quarter of:
-- Red
-- Green
-- Khaki
-- Large scale floral print
For the borders I used two more fat quarters (light red floral print and the light red blender) and a few scraps from the star fabrics.
Remember, this Lone Star has NO y-seams. Everything is straight seam sewing!
The fabrics again:
I selected the colors over on the right for my quilt.
So, how did I make that 28" x 28" Lone Star quilt from just fat quarters? I'm glad you asked!
I am using my GO TO Lone Star pattern, which makes a 19" (approximately) block. You can get the pattern for this at my Craftsy shop (
Storybook Americana Lone Star, also by Windham Fabrics)
I first decided which fat quarter would be the Lone Star background. I used the larger scale print with the red and green flowers.
My Lone Star is made of eight Four Patch Diamonds. I cut 2-1/2" strips of the red and the khaki print and the green print. Using the 45 degree line on your ruler, slice off the left side of the 2-1/2" green strip (see below).
 |
Trim the left side to 45 degrees using your ruler |
Now add the red strip to the top and sew with 1/4" seam. Press toward the red fabric:
 |
Sew these two strips together |
Repeat for the red strip and the khaki strip. Again, press seam toward the red fabric:
 |
Trim khaki strip and add the red strip as shown |
Now you trim the red strip at the same angle as show below. Notice that the 45 degree line on your ruler runs along the seam line.
 |
Trim red strip even with bottom strip on both strip sets |
Now make cuts every 2-1/2", working along the CUT edge and your ruler. DO NOT - I REPEAT - DO NOT USE LINES ON YOUR CUTTING MAT. Why do I say this? Because too many quilters use those lines by habit and I've seen an entire quilt destroyed by a student who made this cut using the 2-1/2" line on her mat. Very sad indeed! Always use your ruler to measure!
 |
Cut units 2-1/2" wide |
Cut until you run out of fabric. You will have to make two strip sets of each color group.
 |
Continue cutting every 2-1/2" |
VERY IMPORTANT NOTE: It is crucial that you get an accurate 1/4" seam. We are working with bias edges. We are working with an Eight Pointed Star grid. You cannot afford to get wobbly seams, have irregular seams, or press too heavy with your iron. If in doubt, practice your 1/4" seam and make a sample unit or two with scrap fabric.
You need eight units of the khaki and red; eight units of the green and red. One of each are placed together to make one Four Patch Diamond. Notice the placement of the colors. It DOES make a difference. The green and khaki diamonds have to be on the ends as shown:
 |
Take care to place your patches as shown |
Now stitch them together and make a total of 8 Four Patch Diamonds. Press this seam OPEN. The sides of this unit have to be completely even. If you are not getting smooth, aligned sides, you will have to mark a 1/4" seam on one of the long edges in order to get these ACCURATE.
 |
Make 8 of these Four Patch Diamonds |
Now it's time to add the background half-square triangles from the floral print. It is important to AUDITION these as shown. It is very easy to pick up the wrong triangle or turn the right triangle in the wrong direction, and then we know what happens then (out pops Jack the Seam Ripper!)
 |
Lay your triangles out so they look like this |
Flip the small triangle over top of the Four Patch diamond, aligning them as shown below. These background triangles are cut OVERSIZED and then trimmed later:
 |
Align triangles with tips and sides of the Four Patch Diamonds |
Stitch and press TOWARD the background fabric:
 |
Press toward the background fabric |
Now add the larger triangles. You are now able to use the top and side straight edges of the unit to align this triangle:
 |
Align as shown |
Stitch and press toward the background print:
 |
Stitched and pressed. 1/4" seam at top tips of Four Patch Diamonds. They will NOT need to be trimmed |
Time to trim the oversized background triangles, using the sides of the Four Patch Diamonds. You may have to trim the sides of the small triangles, again using the long sides of the Four Patch Diamonds as your guide.
 |
Again, use the 45 degree line on your ruler to help you get a straight cut |
Do this for all 8 of your units. Make these two by two as shown in the "AUDITION" picture above.
Time to sew them into the four block units. We are NOT stitching them as we auditioned them for the triangles. We are making SQUARES and not large triangles. Sew two units together along the sides where the large background fabric triangles are. Yes, you can see the seam (as opposed to a traditional Lone Star, but I'm out to feel successful and not stressed. And when it's quilted, you won't even be able to tell.
 |
Sew two units together as shown. Repeat 3 more times. |
Press this long seam open:
 |
Press long seam open |
Sew the four units into the center star:
 |
Press seams open when you can for a flatter, smoother front |
OK. I'm running out of steam. Let's finish up so I can go take a nap!
I made Nine Patch units for the border.
 |
Make 4 of these Nine Patch units |
Stitch as shown. Attach to quilt sides; press. Trim last two sets of borders even with the center, add a Nine Patch block to each of the short sides of the borders, press, and sew to complete the quilt top.
And here is the quilt again, finished. This was quilted on my HandiQuilter Sweet 16 sit down machine. I loved how quickly I was able to do it. I didn't do anything fancy, just some loops. I guess you could say I'm not so much a quilter as I am a looper!
 |
Peyton's Star, quilted and bound with the remaining red blender |
I made the same size
Lone Star two years ago with the Rebecca Collection by Windham. The diamonds were a single fabric on one and a four patch on the other. Can I show you those?
Hope you enjoyed these easy steps. Check out my pattern at my Craftsy Store:
Storybook Americana Lone Star.