Getting Creative with Borders
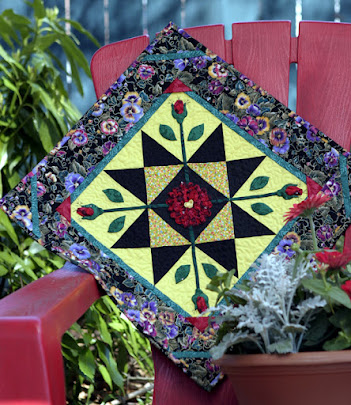
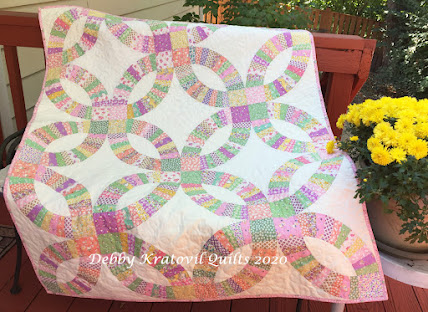
I've shared this quilt center before. It's a simplified Pat Sloan block that I modified in size, cutting, and color arrangement. First, the fabrics. These blenders are from Michael Miller's Krystal Collection. The print is a REALLY, REALLY OLD no-name fabric that I held onto until the right fabrics came along as "go withs." Then I did a tutorial on how to make the block. You can read about it here and here . This is how the blocks looked once I put them into the quilt center. I wanted to make each star with two colors (and background) and not just one. Star Spinners quilt center: 36" x 45" I didn't have any fabric that would give me the 45" length for those two sides. I had to get creative. Here is my solution: Star Spinners quilt top with borders: 45" x 56" I found a print with the colors I needed (the butterflies). I added 5" navy squares (fabric from the center blocks) to each end of the butterfly print and put 5" square...