If it's Wednesday, I'm probably focusing on more beautiful fabric from Windham. Today I am sharing the amazing collection called
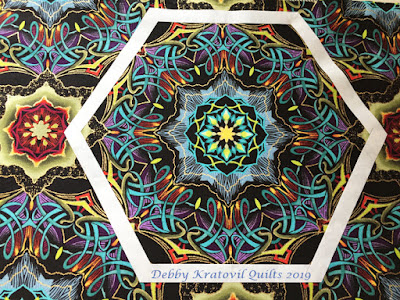
Grand Illusion. It has gilded prints in some of my favorite colors and a gorgeous main print with kaleidoscope motifs. Just because it is an octagon doesn't mean I won't use it for my hexagon patterns. Want to see?
First, one of the motifs. Yes, you can see that I'm planning to center it in the middle of some block. I cut a freezer paper window template and ironed it to the fabric for cutting out.
I'm going to make another of my
Rose Star blocks. It will be super-sized once I add borders. So, I cut a lot of kite shaped pieces of fabric.
 |
| Some of the fabrics in the Grand Illusion collection |
Can I show you where I'm going? I'm not there yet, but I do have my digital file to guide me along the way. That fussy cut hexagon motif will go in the center.
 |
| My digital version of a Rose Star using Grand Illusion |
OK. Let me digress, may I? I was so enamored by that border print (in above pic) that I cut out some for English Paper Piecing. I can show those to you.
 |
| Fussy cutting hexagons for English Paper Piecing |
And I made some sample blocks for 3 upcoming classes this summer. I used both the red and the blue color ways. These are 2" hexagons and 2" diamonds.
 |
| Two blocks using those fussy cut hexagons |
Back to my
Rose Star in progress. I used my acrylic template to cut some fabrics. Here's one using the red (which won't be in my quilt but I'm planning a Rose Star variation which I hope to finish soon.) Notice that there is MINIMAL fabric waste. And my method for cutting uses 2 less cuts than the traditional rulers on the market. You just flip-flop the ruler. What you see below are FOUR kites cut from a 4-1/4" x 7-1/2" rectangle (doubled). Those are TINY scraps left over, aren't they?
 |
| Cutting kite shapes |
Here is the center hexagon which will be surrounded by double kites. As I shared in previous weeks, that center hexagon will be interfaced and appliquéd to the center.
 |
| Auditioning the fabric kites around the center hexagon |
Here are the remaining 3-Kite units which will surround what you see above.
 |
| Two stacks of 3-Kite units |
You'll have to wait for next week to see it all put together. I hope you're intrigued!
In the process, I pulled out the box for my Rose Star samples and found a few I had made using some previous Windham collections. This is from the Flora Collection (2016)
 |
| The beginning of another Rose Star variation |
And a double pieced center with split kites. I placed it in the center. These are from another Windham collection.
 |
| Center fabrics are from the It's a Hoot Collection |
Here is how I stitched and then cut those Split Kites. All 6 of the pieced kites must have the fabrics in the same position. You can't use the two units at the bottom in the same hexagon block. As me how I know . . .
 |
| Split Kites |
When I'm creating a new pattern and samples for teaching, I make LOT of units and block parts in various stages and steps. I think students want to see a lot of variations and love seeing how I got from Step 1 to the last step. My Rose Star box is bulging. Yes, this is how I store my projects. I went from 49 of these Chobani yogurt boxes to about 30 now. It took several years for me to eat this yogurt, btw!
 |
| This is how I store my various projects and workshops! |
I'll have more to share next week. All the parts are cut and many are stitched. The
Rose Star is not a difficult block - it honestly goes together quickly. You can find it in my Etsy store - both the digital file and the printed pattern with acrylic template.
Check it out!
Come back next week for what I hope will be the reveal of my Grand Illusion Rose Star.


Hi Debby! This fabric and block remind me so much of a kaleidoscope. Just turn the hexies and the pattern will change. Such pretty fabrics! ~smile~ Roseanne
ReplyDeleteGorgeous fabric. I will be looking for it in stores near me.
ReplyDelete