This is my process for making the January 26 block from Katja Marek's Hexagon calendar.
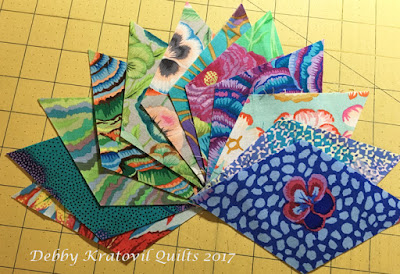 |
| 18 diamonds cut for my six Baby Blocks |
This block is what I would call a traditional Baby Blocks. I begin with a lot of diamonds. Each block uses 3 diamonds and I will be making 6 blocks. Put on your math hat: what is 3 x 6? 18 diamonds! I am using all Kaffe Fassett fabrics for the diamonds.
Then what's next? I cut 120 degree triangles from my background fabric:
 |
| Oversized 120 degree triangles |
Instead of English Paper Piecing (EPP) these, I have cut out patches VERY close to the size used in the calendar. This will have the SAME result, just slightly larger (ie, about 1/4").
I join two of these odd sized triangles to each of my diamonds. Hey! What's that little dot at the top of that diamond? That's how I will know where to stop stitching when I put all three of these sections together. You'll see.
 |
| Two triangles joined to a single diamond |
Here are the 3 diamonds I selected for one block. Yes, I know. There's a y-seam about to happen. There actually is no other way to stitch this one. But we're going to get back to that little black dot.
 |
| Three sections to my Baby Blocks |
The marked dot tells me where to stop stitching:
 |
| Stitch from the raw outside edge to the dot |
Now what?
 |
| Sewing the 3 diamonds just UP TO the marked 1/4" dot. Then you can "spin" the center join |
And from the front?
 |
| Trim, leaving 1/4" seam |
Let's see another:
 |
| This is the Baby Blocks upside down |
I made a total of 6 Baby Blocks. Then, I added a triangle to 3 of the 6 sides. I used one blue fabric for 3 of the blocks and a second blue print for the other three.
 |
| Adding triangles |
And, how does it all look? Here is my wreath of Baby Blocks.
 |
| My wreath of Baby Blocks! |
My plan for this one is to turn it into an awesome table topper. I love looking at all these delightful, colorful Kaffe Fassett prints, don't you?


Lovely.
ReplyDeleteYou do such a great job of interpreting the designs and making them your own. Nicely done.
ReplyDeleteHi, Debby! Although I'm usually not a fan of multiple bold fabric prints used together your choice of background makes this one work for me, especially, admittedly, the one just above your name. I could see myself trying this one with some of my bolder stash fabrics. Y-seams aren't scary, they just take time and thought. Thanks as always for inspiration and the occasional push outside my ever-expanding comfort zone. Hope to see you at Cleveland Expo this year. (janeherbst at roadrunner dot com)
ReplyDeleteThat looks great, Debby. You have a very creative mind! I really like the way you can take anything and make it simpler to piece. =) Thanks for explaining this one.
ReplyDeleteThat is gorgeous.
ReplyDelete