I'm revisiting this topic in order to set the record straight. I have made several Double Wedding Ring (DWR) quilts over the past 25 years and I've shared many of them here on my blog. This is one of my most recent ones. The center is 22" (actually, those blocks are 11-1/4" finished, so the center is 22-1/2" finished).
Pickle Dish gets its name from the cut glass dish used to serve, well, pickles! This was a popular 1930s pattern that was only for those who could stitch accurately and weren't afraid of templates and curved seams. You don't believe me? Ha!
 |
| Pickle Dish pattern in Kansas City Star October 28, 1931 |
Here is my first Pickle Dish quilt using a collection by Windham Fabrics. This is NOT for beginners. It is foundation (paper pieced) and I believe doable only because it IS paper pieced!
 |
| Traditional Pickle Dish |
Then I made one using some Kaffe Fassett fabrics. Lots of points!
 |
| My second Pickle Dish quilt |
But, let's get back to the Double Wedding Ring version of
Pickle Dish. Here is my first block based on my own pattern from several years ago. I have 6 elongated "spokes", a center melon, 4 corner squares and then the curved backgrounds. The SIMILARITIES with the Pickle Dish: corner squares, curved pieced units and a center melon. There are NO "pointy-points"!
 |
| Single block that mimics the traditional Pickle Dish, but is closer to the DWR |
Here is the
16 Block quilt I finished (just the top) last year. It is 58" x 58" and I love these colors. All of the fabrics are various collections from Windham Fabrics.
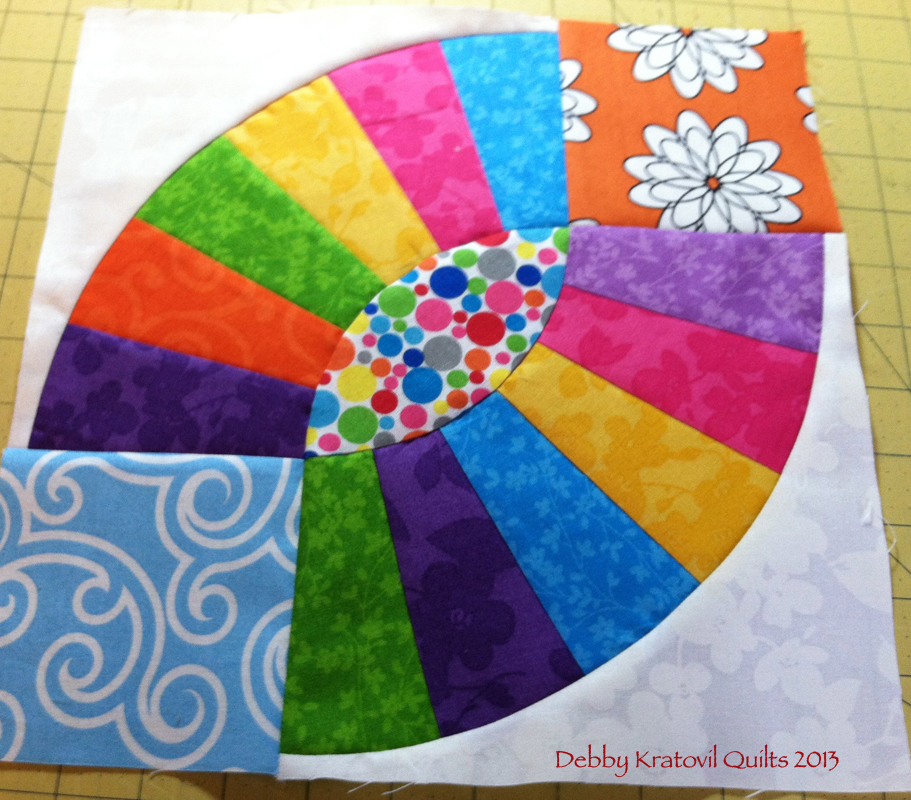
I have taught this as a workshop for the past several years. Though it's listed as Pickle Dish, it's just an imposter! Here is a single block that measures 11-3/4" UNFINISHED. Yes, there is curved piecing going on, but I make it a bit easier because the white outside concave pieces get cut oversized to make the joining much easier.
 |
| Single block from that 16 block quilt above. |
Now, to be fair (and nice), I'm not debating the names here. I love all patterns and have designed well over 1,000 of them in the past 25 years. I decided to show the steps for making this DWR pattern using some Kaffe Fassett prints. The 15 page pattern can be found in my
Etsy store with full size templates and the foundations to print as many blocks as you desire! I have several pages of these process shots to help with adding all these parts for a perfect finish!
The Pickle Dish pattern in my Etsy store has directions for BOTH the four block red and black quilt and for the 16 block quilt, which is a bit more scrappy.
Here is the first arc foundation pieced. Messy looking, but not trimmed yet. Those little pieces of fabric are what I trimmed from each patch before adding the next one.
 |
| Foundation pieced arc |
Removing papers after trimming along the outside edge. You MUST remove the papers before adding the curved melon and background fabrics. Garment sewing teaches us this with needing the "ease" to work WITH you for setting in sleeves, etc.
 |
| Remove the papers to reveal nice, neat seams |
Here are all the parts. Don't sweat bullets. These WILL go together very, very nicely. Nothing is too small or too large. We are working with curved pieces. Stay with me!
 |
| End squares, paper pieced arcs, center melon and curved background pieces |
Adding the curved (concave) background piece. Notice my trick for keeping those straight ends, well, STRAIGHT. An extra pin to make them behave! I pin in the center first, then the two ends. Everything else fits with ease. Don't fight the bias here!
 |
| Keep the straight ends STRAIGHT using TWO pins |
Then you attach the melon shape to one set of paper pieced arcs. If you mark the tip of the melon at the 1/4", and pin with two pins (as we did above) and sew SLOWLY, this will work like a dream. My Craftsy pattern shows a few more pictures of this process.
 |
| Adding the melon shape |
Once all the parts are joined, then it's time to trim! While other patterns only give you a scant 1/4" on the outside background pieces, I include another 1/4" so you have something to hold onto when joining the arc to the BG piece.
 |
| My blocks finish to 11-1/4", so I check my block and trim to 11-3/4" |
This is NOT a pattern for a beginner. You MUST be confident of your 1/4" seam. When in doubt, make a sample block before cutting out your entire quilt!
Here's my final block. Make 3 more and you have the red and black quilt assembly. Make 15 more and you have the 58" x 58" quilt! This is not a fast project, but very satisfying.
 |
| Pickle Dish (or Fat Double Wedding Ring) block: 11-3/4" unfinished. |
Pickle Dish is a fun way to use up your scraps! Unless you don't have any scraps (that's a joke, right?)


Hi Debby! Hmm. I guess I wouldn't call it either name - just cute. HAHA! Thanks for sharing all the details. This is getting PINned for the future. ~smile~ Roseanne
ReplyDelete