This is a post from 2016 featuring a gorgeous collection from Benartex called Dreamscape. They are blender types, so if you don't have these, you certainly can use any solid reading fabrics in your stash.
Here's my final quilt before I show you the steps. This is to entice you to stay until the end to get the FREE pattern for the Striped Star block.
 |
| Striped Star Quilt: 35" x 35" |
And the fabrics I began with:
I LOVE bright colors. I can always find something to sew when I have crayon box colors to work with. Having the mottled gray for the background (instead of a flat solid) is a perfect "go with."
I've said before that I wait until the fabrics "talk" to me. What did they say?
They told me to scroll through my files and look for something that would make them look good. After all, this is going to be a 12" block and they were each jockeying for the star position. I told them to hold on and I began looking. I came upon a block I call Striped Star that I designed
10 15 years ago (and never sewed). It's for paper piecing and is not for beginners, but is certainly doable for those who are familiar with the technique.
I began with cutting oversized patches for the block: 8 squares 4-1/2" x 4-1/2" of the gray/cloud color and 8 strips 1-1/2" x 6" of EACH of the four colors (grape, daffodil, navy and lime).
 |
| Patches cut for Striped Star Block |
Then I printed 4 copies of my foundation (pattern link appears at bottom of this blog post). Notice that I identified where my patches needed to be placed. Also, on the pattern, there are arrows pointing in the direction of how the patches are to be pressed. This will enable the seams to nestle when joined.
 |
| Pattern with names of patches written down |
The patches MUST be placed so that they angle as shown. Sewn one at a time, pressed and then trimmed.
 |
| Building the strips at an angle |
Then trimming before adding one of the two gray triangles:
 |
| Fold paper back; use a ruler to leave 1/4" seam |
Notice that the edges of the fabrics extend beyond the paper pattern. These will be trimmed later. The gray triangles are also cut oversized. This last triangle is placed first so that you don't mistakenly sew it on the wrong side! Then it gets flipped over and stitched from the paper side.
 |
| Adding the last gray triangle |
Now what?
 |
| Trim fabrics even with the outside line on the paper |
And from the front?
 |
| 1/4 of the block before removing the paper |
Removing the paper? Oh, yeah. That's right! What does that look like?
 |
| CAREFULLY remove the paper without disturbing the seams |
Place the two units together. Sew with 1/4" seam allowance. Because you pressed the seams in opposing directions, this makes for a very nice join.
 |
| Pin at the seams as shown |
And how do you press that seam? I prefer to press it open in order to reduce the bulk.
 |
| Press diagonal seam open to reduce the bulk |
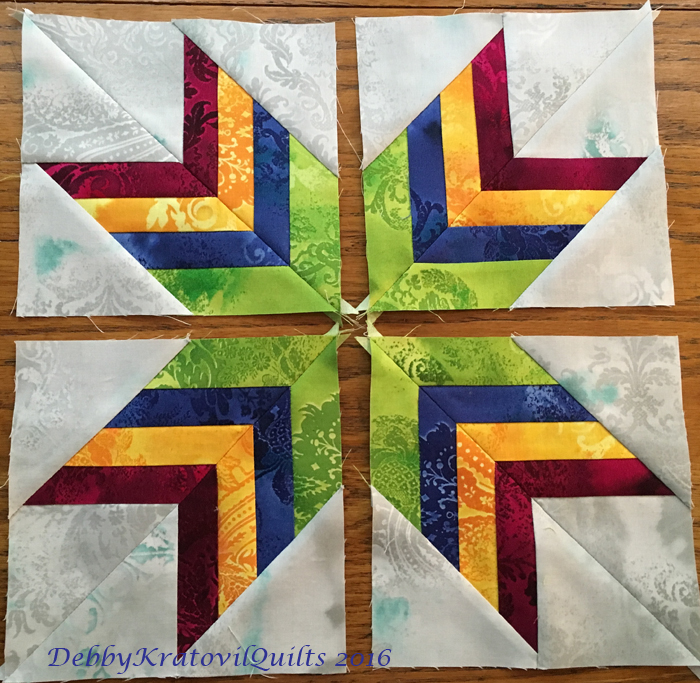
Let's see four units together:
 |
| Four block units before stitching into the Striped Star Block |
A perfect 12" (finished) block made easy using paper piecing.
 |
| Striped Star |
I set the block on point (which takes it to slightly bigger than 17") and then I added some borders:
 |
| More borders from the Dreamscape fabrics |
And again, my final quilt using some Paper Fans fabric:
 |
| Striped Star Quilt |
You can find the FREE Striped Star pattern (in pdf) here:
Striped Star. You can also see more of the fabrics at the Benartex site:
Dreamscape.


Thanks for the free star pattern and I love it! When I click to get the free pattern I get a message that says "this site cannot be reach". Bummer.
ReplyDeleteI love this block, so happy - at least it makes me happy to look at it. How did you apply the first border???
ReplyDeleteI love the colours, so bright, vibrant and Happy, and the center paper-pieced block really catches your eye. Thanks for sharing the pattern Debby. Stay safe and healthy.
ReplyDeleteThanks!
ReplyDeleteBeautiful! I love the colors that you used, very happy indeed! Thanks for the free pattern!
ReplyDeleteThanks for the free star pattern. I like the design and the colors you used.
ReplyDelete